Wednesday, November 19, 2014

Liver loving Thanksgiving sides.


I was having a conversation with my lovely friend Victoria (not her real name, just to protect her identity) about traditional accompaniments for the Thanksgiving Turkey. We both are traditionalists, in the sense that we like Sage and Onion stuffing, as opposed to the Yam, Focaccia, Bacon, Cinnamon, Marshmallow and Maple Syrup monstrosities that are prevalent over here.
It is always an overload in the US and a possible ride to the A&E can not be over ruled.
My challenge was to come up with something simple, tasty, liver friendly and marshmallow free.

I know I have used golden beets before, but they are one of the best and healthiest veggies around. combined with the humble Brussels Sprout, and a handful of Walnuts, you have a side dish worthy of moist Turkey, Mashed Potatoes and Gravy.

Choose medium sized firm sprouts and cut them in half. Steam them and cool in cold water to keep them green, yet still firm.
Set to one side.


Boil the beets, skin on.They are done when you can push a sharp knife into the middle with a little force. Once cool, the skins can be removed easily with your fingers. Cut them into wedges like this.

 
Prior to serving, toss the beets, walnuts and sprouts together in a saute pan with Olive Oil, some fresh Thyme and then season to your taste.


Easy peasy and not a marshmallow in sight.............


Saturday, September 6, 2014

50 ways to love your liver. Beets 2 ways

Beets are pretty cheap in the market this week, so I thought I would show you two liver healthy meals. This only works if you buy Beets with the leaves still attached though :)

 
I chose both red and gold beets as it adds a nice color contrast,
Trim off the leaves and set to one side. Pop the beets into a pan and bring to the boil until partially cooked through. Drain and cool down before handling. At this stage, the skin should just slough off when pressed with your fingers.

Peel, then cut in half, and then each half in thirds, until you get wedges as shown below. Place in a pan with olive oil, some rough cut onion, a few cherry tomatoes and spices. Cook the beets for 10 minutes before adding the tomatoes as they will get a bit soggy if you put them in at the same time.
I used my own Garam Masala for this dish but it tastes just as good with crushed black pepper and salt.


Pop in the oven at 350 degrees to roast, turning occasionally to caramelize the sugars.
Once cooked, remove from the oven and add a handful of Arugula so it just wilts and serve immediately.

Now for the greens.
 
Wash the greens and cut into chiffonade so they cook really fast. Add a little veggie stock to a large fry pan and add the beet greens and cover.
As soon as it comes to the boil, add a teaspoon each of crushed Ginger, Garlic and Turmeric. Stir quickly and then add a tablespoon of whisked plain Yoghurt.
 
I topped this with quickly fried red chillies and onion, seasoned with Nigela and Poppy seeds. I use this often for Dahl dishes to add interest and a bit of zing to otherwise bland lentils.
 
 
These make  great side dishes for a curry evening.
 
I served both with a Chicken and Apricot Curry and Basmati rice, but they do work well individually


Your liver will love you for this one.

Wednesday, August 27, 2014

50 ways to love your Liver

I wish I could take the credit for this title, but it belongs to my good friend's brother, Matt Eggleston.
 
We were discussing Blog topics and he came out with this wonderful one liner. I took up the challenge and started to research food that is beneficial to your Liver. God knows, I could use a little self help right now. If you want to know more about these ingredients and why they are beneficial, use google.
 
I may never reach the 50 mark, but unless you start at #1, it will become a self fulfilling prophecy.
 
1/ Avocado, Walnut, Grapefruit and Arugula salad.
 
There may be a more succinct name for this, but it doesn't come readily to mind. Maybe I need some brain food too, but I digress.
 
Top and tail a fresh grapefruit and start to remove the skin and pith with a sharp knife. Work round the GF in a circular motion, paring the skin away as if you were following the shape of a wine barrel.


Once you have it naked, so to speak, you can then cut down the veins on each side of the segment to release the flesh
 
 
The remaing skin and pulp should be squeezed into a glass and makes a lovely pre salad detox :)
 
Once this is done, peel and half a ripe Avocado. The next shot shows a partially sliced half, splayed out in a fan. You could just slice it if you can't be arsed  bothered to do that. It will taste the same.
 
 
Wash and dry your Arugula / Rocket, and arrange on the plate.


Add all other ingredients and drizzle some olive oil and Balsamic, then serve.
 Please feel free to adjust to your taste. I added some fig to this to add a bit of color, and I didn't get shot by the food police, so be brave.
 
Bon Appetite.


Tuesday, July 22, 2014

Two totally unrelated treats. Minted Pears and Citrus Aioli

Sometimes life has a habit of getting in the way of business, and in this case from Blogging. I have been busy all summer catering outdoor parties due to the most amazing weather we have been having, but I did find time to make a few treats for myself and friends.

#1 - Minted Pears
Last harvest time, we aquired a lot of lovely ripe pears. Unable to eat them all, we canned some in Cider Vinegar infused with fresh Mint. Almost one year on, I opened the first jar to go with some Lamb shoulder steaks fresh off the grill.


Along with Fingerling Potatoes, Snap Peas and Kale from the garden, this made an excellent dinner on a warm summer evening.


#2 - Tomatoes, still warm from the greenhouse.
 
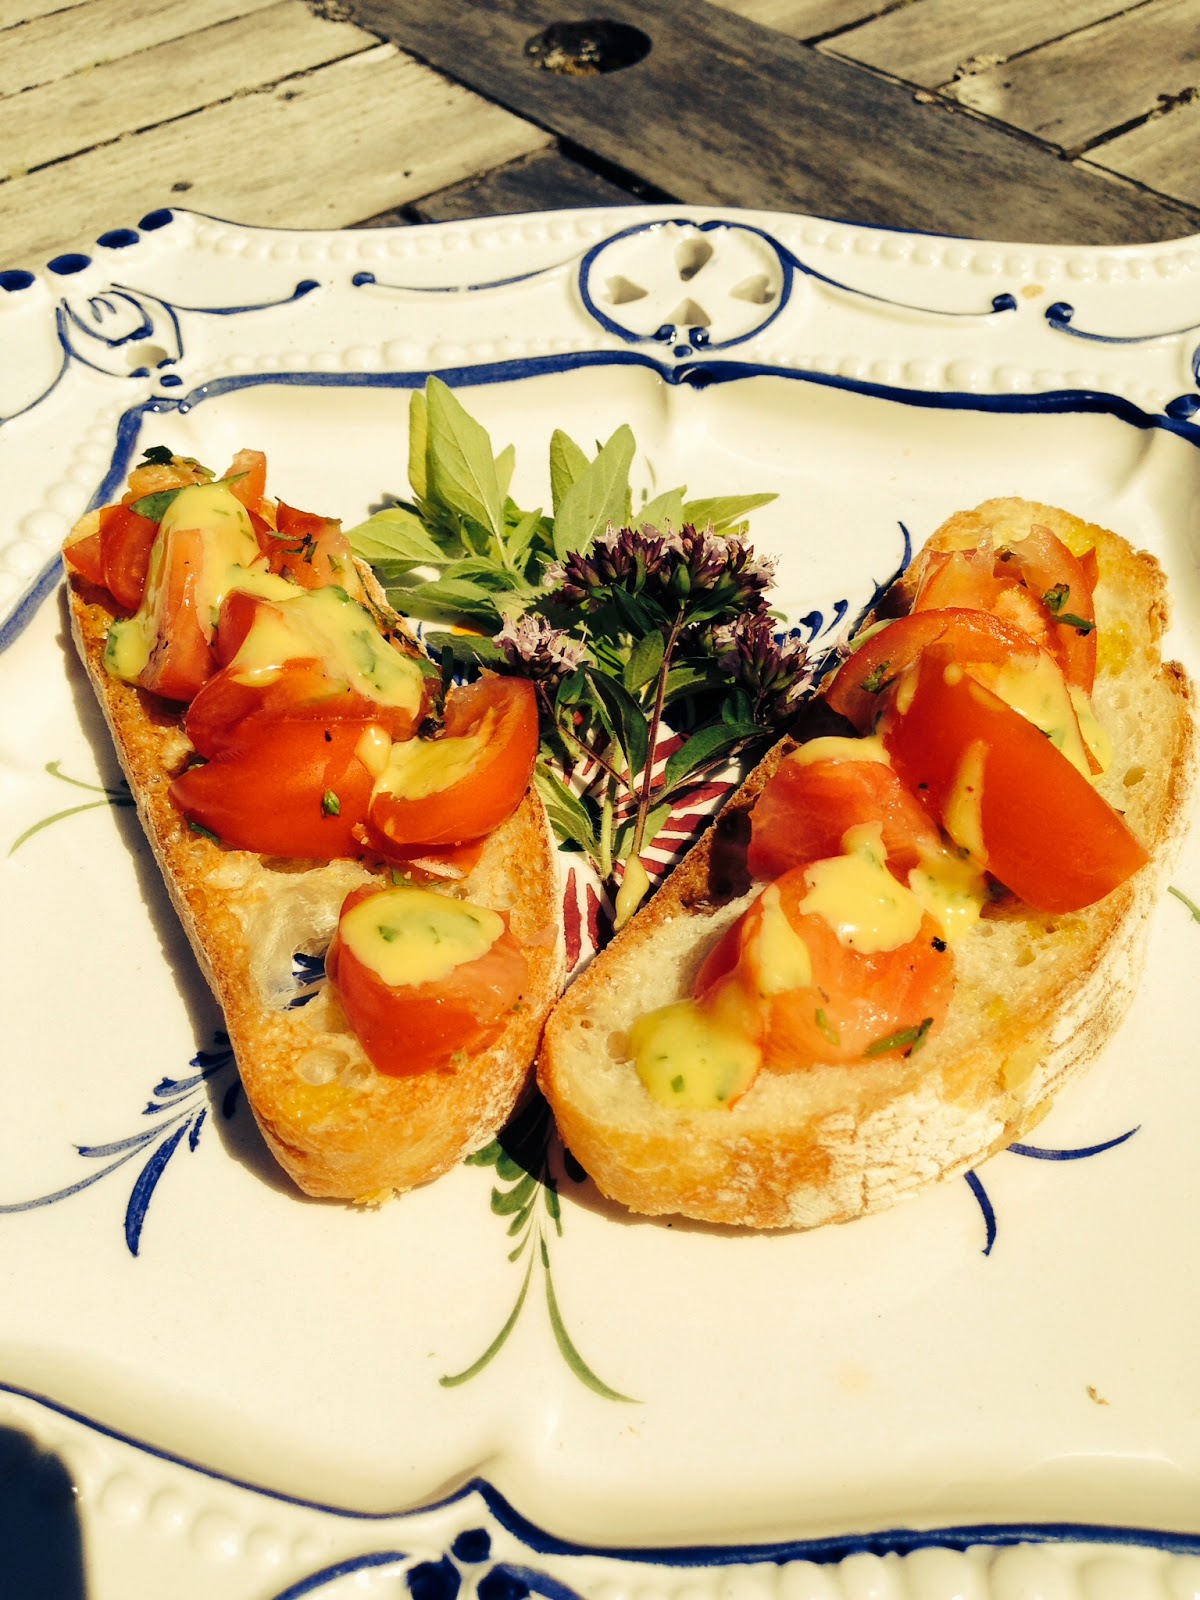
I had some Ciabatta bread left over from the previous night, so I toasted a few slices with a drizzle of Olive Oil, mixed the cut tomatoes with fresh Oregano, salt and black pepper, and then dripped fresh Citrus Aioli over the top. Garnished with Oregano and Marjoram flowers, and a glass of Viognier in hand, I braved the elements outside on the deck.
 
 
Whisk the egg yolks, lemon juice, English mustard and seasoning until combined and double in volume, then add the olive oil bit by bit, whisking constantly. Add the crushed garlic at the end.


Oh how I love my garden in the summer.

Only one problem, I have to share everything with my girls, even my wine.


Thursday, May 1, 2014

Vegetable Samosas


A good friend of mine was unwrapping some frozen Samosas to bake for her partner's lunch one afternoon, and casually asked if I had ever made them.

A simple question requires a simple answer.

No.

However, as is the way with all simple questions, the repercussions are often like icebergs, 80% unseen.

I started to think of why I had not made these before, as they are one of my favorite Indian snacks, and not coming up with any good reason, I started to look for a good dough recipe. Without that, it doesn't even matter what you put inside.
I found one that did not include fat, and as I am theoretically trying to reduce my fat intake, seemed a reasonable proposition. I made the dough, set it aside as requested and then made the potato and vegetable filling.
Here is a nice recipe for the filling, but you can make these with anything you have.

3 tbsp vegetable oil
½ tsp mustard seeds
60g/2½oz chopped onion
1 tsp finely chopped ginger
60g/2½oz frozen peas
1 tbsp ground coriander
1 tsp ground cumin
¼ tsp red chilli powder
½-¾ tsp garam masala
1-2 tsp dried mango powder, to taste (alternatively, use juice of 1/2 a lemon)
salt, to taste
splash water
600g/1lb 5oz potatoes, peeled, boiled until soft and crushed into large lumps
4 tbsp chopped fresh coriander leaves.

Heat the oil in a small non-stick pan and fry the mustard seeds for about ten seconds, or until they begin to splutter.

Add the onion and ginger and cook for 2-3 minutes over a high heat. Add the peas, stir well and add the spices, mango powder, salt and a splash of water. (If using lemon juice, add this instead of the water.) Cook for 1-2 minutes, then add the potatoes and coriander and cook for 2-3 minutes. Taste and adjust the seasoning.

So far, Easy Peasy Lemon Squeezy.


I rolled out the balls of dough into a circle, and cut them in half, as instructed and then started the filling. Moisten the diameter with water, or you can make a little "glue" with flour and water.
It is a little tricky at first to get the pocket size just right, but after a few throw aways, I got the hang of it.
Fill half way, then fold the flaps down and close the parcel, then set to one side until completed.
I brought the oil up to frying temperature and inserted the newly formed samosas, and watched expectantly as they sizzled and crisped to a beautiful golden brown.

 
I took a photo and sent it to my friend, who then asked what they tasted like.

Another simple question.

They were bloody awful. The filling was tasty, but the dough was as tough as alligator hide.

Round 2
I had plenty of filling left, so I looked for a different recipe for the dough. As usual, fat is a key ingredient. Many use ghee or vegetable oil. I used ghee.

Here is the final dough recipe.

2 cups maida or all purpose flour
4 tbsp ghee or oil
5-6 tbsp water (I added 5 tbsp + 1 tsp water)
 
Salt to taste. ( I added ¾ tsp salt)
 
Incorporate the flour, ghee and salt and rub together as if you were making short crust pastry. Once you get to the crumb stage, add the water and knead the dough until it is smooth. Continue to knead for another 10 minutes, or use a food processor or mixer.
 
Turn out and let it stand covered for 15 minutes. Don't put it in the fridge as the fat will solidify.

This one worked, so I was happy to report to my patient friend I have, in fact, made Samosas.
 
Served here with minted Yogurt.

Wednesday, March 5, 2014

Spring may have sprung, but the comfort food is still on the table

I don't know what the weather is like where you are, but here it is still wet and cold.
The fire never seems to be off.
Spring may have sprung, but the comfort food is still on the table
Here is a traditional Mac n' Cheese with a few added bits.
As with all Mac n' Cheese, it is easy to make.


While the Cauliflower florets and Anaheim chilis are roasting in a little dab of olive oil, you can have the pasta cooking off and the Bechemal cheese sauce on the go. Keep the roux fairly slack and cook it for a few minutes without browning. Add the milk bit by bit and stir briskly so the sauce is nice and smooth. You will know the consistency is correct when you can coat the back of a spoon without it sliding off.


I added a teaspoon of English Mustard and grated Cheddar to the sauce, as well as some thyme, salt and ground black pepper. I also added a clove of crushed Garlic.


Drain the the pasta once cooked and then combine the sauce and pasta together, then add the vegetables and fold in gently so you do not break the florets.


Pour the mixture into a baking dish, top with more sharp cheddar and pop in a hot oven to crisp.
I served this with some lightly sauteed Asparagus.


It was deeeelicious.


Monday, February 24, 2014

I am still here


One would think that I have been too busy to post anything since January, judging by the total lack of anything appearing in these pages. I have been cooking, catering and partying, but not as often as I would like. Certain issues on the home front have at times, rendered me completely paralyzed with depression. I am not comfortable using the D word, as it might belittle many people who are clinically depressed, and mine was certainly not that. Unhappiness would be a better word, and totally of my own doing. With the help of many wonderful friends and my son, I feel as if I am back in control of my life.

Hopefully, i won't be absent for such a long period of time again.

I made some crispy fried Vietnamese spring rolls recently which I would like to share with you. They are relatively easy to make, except for getting the rice paper at the correct consistency to roll without tearing up. Many years ago, while working in Les Orres France, as a ski instructor, I was invited for dinner by the local Doctor and his wife. He was 1/2 Vietnamese ( probably still is) and was an amazing chef as well as a brilliant acupuncturist. The dinner was amazing, and I tried to replicate it when I got back to the UK.
What a cluster f**ck.
I had all the right ingredients, but I had not watched him soak the rice paper. On my return the following season, I asked him to show me what he did.

Here is how you do it.


The filling is a mixture of ground pork, fresh crab and rice vermicelli. The rice noodles only need boiling water poured over them to cook. Drain and add them to the other ingredients.
It should have had some black fungus in it too, but I couldn't find any at our local store, and I was buggered if I was going off island to get it. It is usually dried, so if you do add it, soak it first. Add some crushed garlic and a touch of ginger and a splash of fish sauce, and season with salt and pepper. Combine and set to one side.


For the wrappers, you need a large bowl or tray filled with hand hot water. Set it next to a large cutting board. The filling should be next to that and a tray with waxed paper should be set next to that, in a sort of production line.

Pick up one wrapper and soak it in the hot water for a couple of seconds until it starts to become pliable. Lay it on the board at the end next to the filling. Do the same with the second. Go back to the first one and add the filling and then fold and roll, tucking in the ends as you roll. Place the roll in the tray with the wax paper, then dip the 3rdwrapper and place on the board. Go back to filling the second wrapper and so on until all your wrappers are filled.


In a large shallow pan or Wok, heat some vegetable oil to about 320 degrees and start frying them off in small batches. There should be enough oil to cover them completely. Be careful to give them plenty of space as they will stick together. Turn them often until a nice golden brown in color, then place them in a tray in the oven to stay warm (about 200 degrees). I cut them in half to serve, as they can be a bit of a mouthful.

Once they have all been fried, make a dipping sauce with lemon juice and fish sauce, crushed garlic and add shredded scallions to garnish. You can vary the amount of ingredients to taste.

Try it, it is delicious and fairly impressive to serve.